What you get out of the box
ClosingFox comes with a ready-to-use Sales Pipeline:Fresh Leads → In Follow Up → WFP → SV Prospecting → Booking Ready → Final Negotiation → Booking Done
You also get a Payment Pipeline for post-booking tracking:Token Pending → Agreement → Home Loan → Registration → Possession
You can use these as-is, rename them, or create your own from scratch.Create your own pipeline
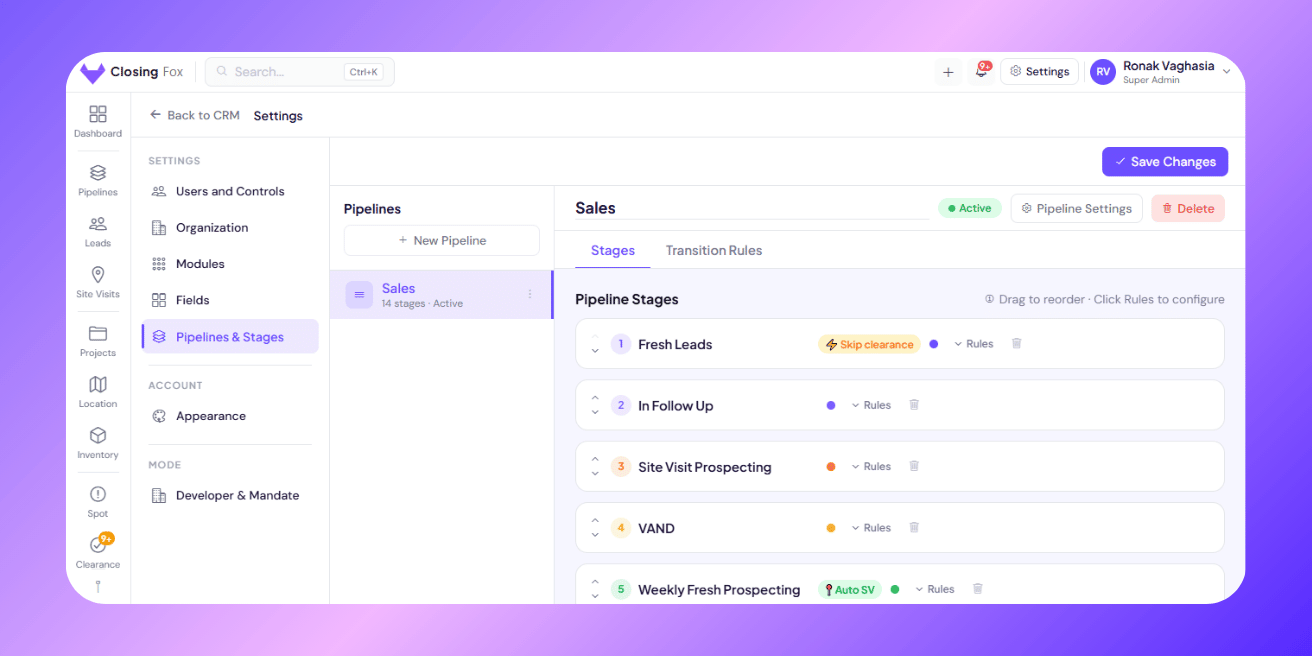
Step 1: Open Settings → Pipeline Config. Step 2: Tap New Pipeline. Step 3: Give it a name your team understands. Example: “Residential Sales” or “CP Referrals”. Step 4: Pick a color. This shows up in your sidebar and Kanban board. Step 5: Tap Save Changes. Your new pipeline is live.Add and arrange stages
Every pipeline needs stages. Think of them as checkpoints in your sales process. Step 1: Tap + Add Stage. Step 2: Name it something your team actually says. Not “Stage 3” — say “Site Visit Done” or “Negotiation”. Step 3: Pick a color. Use green for progress, amber for pending, red for at-risk. Step 4: Drag stages up or down to set the order. Or use the ↑↓ buttons. Step 5: Tap Save Changes. > Tip: Every pipeline comes with Won and Lost stages already. You can rename them but can’t delete them — they’re how ClosingFox tracks your conversion rate.Stage superpowers
Each stage has optional settings that automate your process:| Setting | What it does | When to use it |
|---|---|---|
| Auto Site Visit | Creates a site visit automatically when a lead enters this stage | Turn on for your “Site Visit” stage — saves your team from manually scheduling |
| Require Custom Fields | Forces your team to fill key fields before moving the lead out | Great for qualification — e.g., budget and BHK must be filled before “Qualified” stage |
| Skip Clearance | Lets team move leads to Lost without manager approval | Use for early stages — no point approving a lead that never answered the phone |
Control how leads move between stages
By default, leads can move forward freely and backward by one stage. But you can lock this down. Step 1: Tap a stage card in Pipeline Config. Step 2: Tap Rules to expand. Step 3: You’ll see checkboxes for every stage. Green = allowed. Red = blocked. Step 4: Toggle to control which moves are allowed. > Business Impact: Transition rules prevent your team from gaming the pipeline. No skipping “Site Visit” to jump straight to “Booking Ready”. No sliding leads backward to inflate numbers. What gets measured gets managed — and rules make sure the measurement is honest.Common patterns
Forward-only (strict process)
Block all backward moves. Leads can only move forward: Fresh → Qualified → Visit → Negotiation → Won. Best for teams where the process must be followed in order.
Forward + escape valve
Allow forward freely, plus allow backward to “Fresh Leads” only. Useful when you want to restart cold leads without deleting them.
Gated qualification
Require custom fields at each gate. Example: can’t leave “Qualified” without filling budget. Can’t leave “Site Visit” without logging the visit outcome. Ensures data quality as leads progress.
Tips from top-performing teams
- 5-7 stages is the sweet spot. Fewer = not enough visibility. More = your team won’t bother updating.
- Name stages in your team’s language. If they say “WFP” (Working for Possession), call it that. Not “Stage 4”.
- Color-code with meaning. Green = progress. Amber = waiting. Red = at risk. Your Kanban board becomes glanceable.
- Review monthly. If a stage always has 0 leads, remove it. If one stage is overflowing, split it.
- Use the Transition Rules matrix (tab in Pipeline Config) to see all rules at a glance — rows = from, columns = to.
What happens after setup
- Your Kanban board shows columns for each stage — drag leads between them.
- New leads (from portals or manual entry) land in the first stage automatically.
- Your Dashboard shows how many leads are in each stage and how long they’ve been there.
- Stale leads (stuck in a stage for 7+ days) get flagged automatically.
Common questions
Can I have multiple pipelines?
Yes. Many teams use one for sales and another for post-booking payments. You can create several — up to your plan’s limit (10 on the Developer plan).
Can I rename the default stages?
Yes. Change any stage name to match your process. Even “Won” and “Lost” can be renamed (e.g., “Booked” and “Dropped”).
What happens to leads if I delete a stage?
Leads in that stage stay in your system. They just won’t have a stage assigned until you move them.
Who can change pipeline settings?
Only Admins and Site Heads. If you don’t see Pipeline Config in Settings, ask your admin for access.
Next Steps
- Connect your portals — so leads flow into your pipeline automatically
- Set up assignment rules — auto-assign leads to the right person
- Enable auto call detection — log every call automatically
- Bulk import your existing leads